Okay, so your fridge is full of fresh veggies from the farmer’s market and the Instagram accounts you follow are predominantly gardeners. The green thumb has officially bitten you- it’s time to become a gardener!
What does it exactly take to have a successful garden?
Social media will tell you that it takes a brand new $800 spiffy whats-a-ma-bobbit, but did you know that you can have a beautiful garden for an almost free cost?
Yes! You can get free compost from your kitchen (for amending your soil), and free seeds from kind neighbors and seed libraries. Don’t forget about getting horse manure from Billy Bob up on Scarborough Lane. He’s happy to get rid of it!
That covers the dirt and seeds of the gardening operation, but where do we put all that dirt and seeds to make a real garden?
In your very own handmade garden bed!
Yes, for a limited time, you can craft your own garden bed for free!
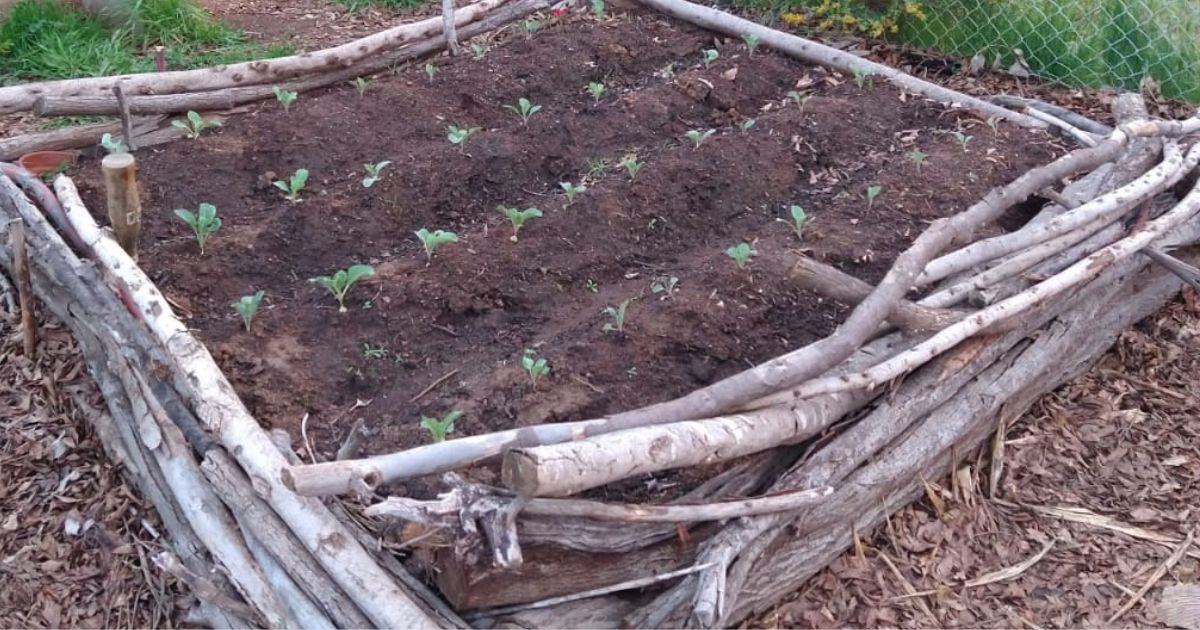
All jokes aside, I am happy to share with you how our little family has constructed our raised garden beds for little to no money.
Step 1: Measure and Plan Your Space
The first thing you need to do is to think about how many raised beds can actually fit in your garden space. You can do this by measuring the area you are working with and marking the area with rocks and/or a line of string to show where the walls of the raised bed will go.
*Note: Take into account the amount of shade over your garden, so that you can set up your raised beds in a mostly or fully sunny area.
Step 2: Gather Your Supplies
A) The average size of a raised bed varies from 4×4 to 2×8. You can choose if you want a rectangular shape or a square shape. Many people choose rectangular for the accessibility to the veggies (shorter sides means you can reach across to harvest veggies easier).
For this example we will talk about the 2×8 raised bed. To make one 2×8 sized raised bed you will need about 20-30 eight foot branches and 20-30 two foot branches. Decide if you want larger sized branches or skinnier branches – you will need less branches if you choose larger branches as they take up more space.
*Note: Try to use straight branches when making your raised bed. This helps fit them into stakes in the ground.
The branches can be easy to find if you live in a heavily wooded area. You can chop down branches easily with a chainsaw or if the are smaller you can clip them off.
*Note: The branches should be of similar size as you will be piling them up.
If you don’t have a tree in sight of your property you can offer to trim or cut down a neighbor’s tree (preferably am invasive or decaying one). That’s how we got the material for our raised bed- my partner was working a landscape job and asked the owner if he could bring home the leftover branches and posts.
If the two options above don’t work you can always pay to buy wood. Also, don’t forget about the magic of Craigslist and Facebook Marketplace – many times people are giving out used wood, or selling it for super cheap.
B) the next material you will need is stakes to hold your branches in place. These cabn be re-bar pieces or skinny wood sticks. The important thing is that the sticks are of similar size and close to the height of the raised bed (knee height).
C) a mallet for a’banging.
D) an electric handsaw (to use if branches are of varying size).
Step 3: Make the Base of your Garden Bed
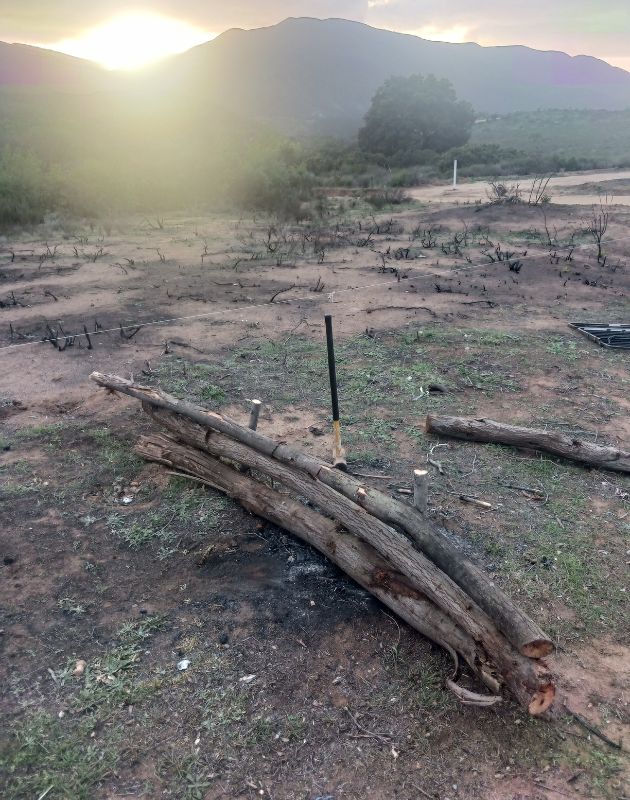
Now’s the time to lay down the branches/wood pieces to make the base of your garden bed. If you’re going to make a rectangular shape you will need to put the two shorter branches on opposite sides (facing each other) and the longer branches will go on the other sides.
If there is an awkward sized branch feel free to saw it off to make it even with the other branches.
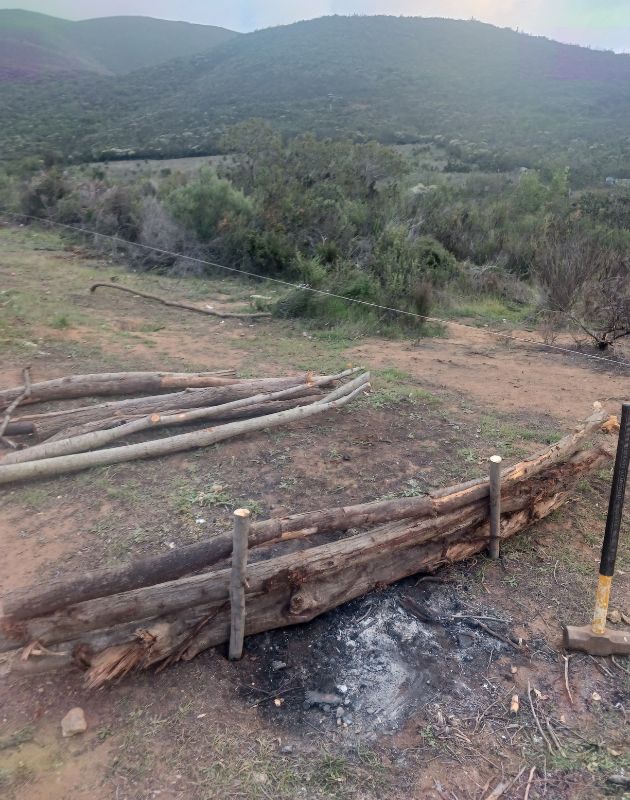
Now that you have the base layer down you’re going to grab stakes and put them in the ground to hold your bed together. It doesn’t quite matter how many, as long as you’re putting one on the outside of the branch and one directly on the other side of the branch (inside the garden bed).
For reference, we used about 6 sets of stakes (so we used 12 stakes in total).
Use the mallet to pound those bad boys into the ground!
Step 4: Make the Walls of your Raised Bed
Now that you have a sturdy space made by the stakes, you can pile up your branches to make the walls of the raised bed. This is sort of the trial and error of the project as some branches may not fit into the slot that the stakes provide.
Remember, if you have a handsaw you can trim those babies down for functionality, then pile the branches until they reach the top level of your stake.
*Note: If you want them to be perfectly lined up in height, you can use your mallet to pound the stake down until it becomes an even height with the branch.
Or! You can leave space so that your stake is sticking out. This will make putting up a hoop house over your raised bed much easier. PVC pipe can fit over the stakes and make a sort of archway. Alas, let’s rest before we start another project, please!
That’s it! You made your own raised bed in one day.
Now you just need to line the bottom of the raised bed with chicken wire (to protect against the devils of the garden aka gophers), add cardboard at the bottom (if you desire), add compost, add horse manure, and add the dirt.
Then you will have a functional raised bed and you will be one step closer to growing and eating all sorts of yummy food!
